
The dark web refers to websites that are not on the regular internet but are instead hidden in a private network that is only accessible using specialized web browsers, such as the Tor Browser.
The Tor Browser is an open-source web browser created for anonymous browsing and to evade censorship. It routes users' traffic through thousands of volunteer-run servers called nodes/relays. These nodes/relays and the websites operating on them make up the Tor network, or as it is more generally named, the dark web.
Sites running on the Tor network are called Onion sites as the URLs end with the ".onion" TLD, such as the CIA's website at http://ciadotgov4sjwlzihbbgxnqg3xiyrg7so2r2o3lt5wz5ypk4sxyjstad.onion. Notice how the URL ends with the .onion TLD.
These sites are only accessible over the Tor network and are commonly used for privacy and anonymity. The Tor Browser also features many built-in protections that protect against tracking and fingerprinting.
While the Tor network was not created for illegal activities, as it's harder to trace websites to their physical location, cybercriminals have also adopted it to host their websites.
For example, ransomware gangs use the dark web to leak stolen data and extort victims, and dark web marketplaces sell illegal items, such as drugs, weapons, stolen credit cards, stolen credentials, and malware.
However, not all sites running on the Dark Web are malicious. For example, legitimate sites, such as the BBC, the New York Times, ProPublica, and Facebook, have made their sites accessible as a Tor Onion URL to help people avoid government censorship.
This guide will teach you how to install the Tor Browser in Windows easily so you can access the Dark Web or browse the web anonymously. The same general process applies to other operating systems, as Tor is also available for Mac and Linux.
How to Install Tor
To gain access to the Dark Web, you must first install the Tor Browser. You can find the installer on their website: torproject.org.
Upon opening the Tor website, you will be presented with various download options for the operating systems that Tor supports, including Windows, macOS, Linux, and Android.

Source: BleepingComputer
Upon selecting the button for your operating system, you will be prompted to download the installer, which you should save to a folder.
Once the file is downloaded, run it to launch the installer and follow the prompt until the Tor browser is installed.
How to access your first Dark Web or Onion Site
When the Tor Browser is launched, you will be brought to a purple homepage with a search field for the DuckDuckGo search engine in the center of the screen. This search field allows you to perform regular, but now anonymized, web searches through DuckDuckGo's Tor site.
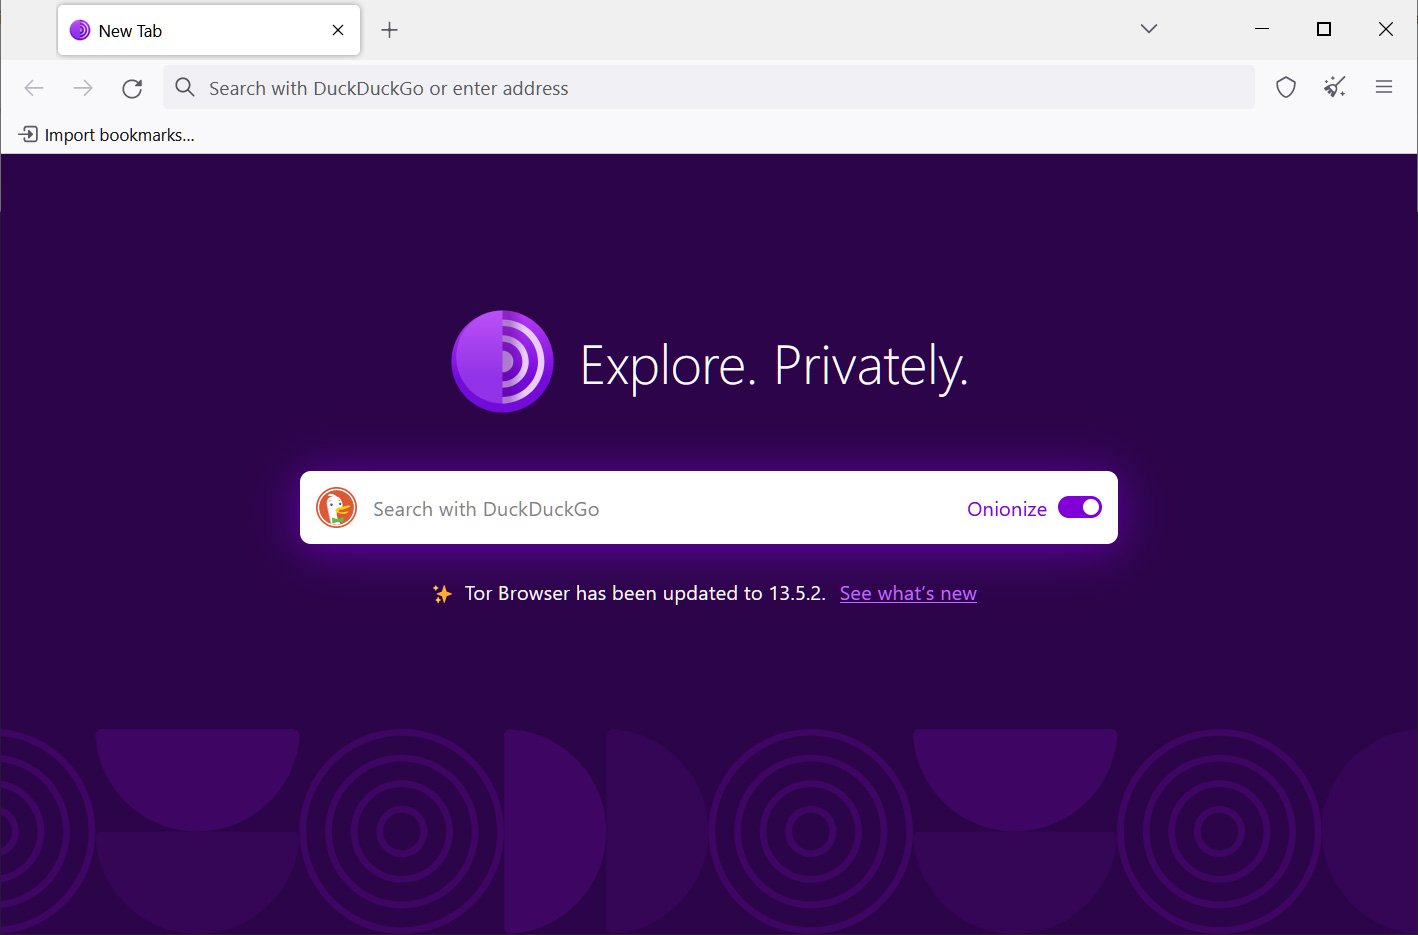
Source: BleepingComputer
The search results from DuckDuckGo will be for websites on the regular web, which you still visit through Tor. For dark websites, you need to enter the specific Onion URL you wish to visit into the browser's address bar.
These URLs are usually very long, consisting of a random jumble of letters and numbers. Though you likely won't remember the addresses of onion websites, you can find these URLs on various websites on the internet.
Some safe URLs you can use to access news, government websites, and directories of Tor URLs can be found below:
- Tor Links - A directory of Tor URLs you can click on to visit the site.
http://torlinksge6enmcyyuxjpjkoouw4oorgdgeo7ftnq3zodj7g2zxi3kyd.onion/ - Ahmia - A search engine for dark websites.
http://juhanurmihxlp77nkq76byazcldy2hlmovfu2epvl5ankdibsot4csyd.onion/ - DuckDuckGo - The privacy-centric search engine DuckDuckGo has created an Onion URL that you can use to search the web (not the dark web).
https://duckduckgogg42xjoc72x3sjasowoarfbgcmvfimaftt6twagswzczad.onion/ - ProPublica - Tor site for the news site ProPublica.
http://p53lf57qovyuvwsc6xnrppyply3vtqm7l6pcobkmyqsiofyeznfu5uqd.onion/ - The New York Times - Access The New York Times through Tor.
https://www.nytimesn7cgmftshazwhfgzm37qxb44r64ytbb2dj3x62d2lljsciiyd.onion/ - BBC - The British Broadcasting Corporation on Tor.
https://www.bbcnewsd73hkzno2ini43t4gblxvycyac5aw4gnv7t2rccijh7745uqd.onion/ - Facebook - Access the social media site through Tor. Facebook is banned in numerous countries, including China, Iran, North Korea, and Russia.
https://www.facebookwkhpilnemxj7asaniu7vnjjbiltxjqhye3mhbshg7kx5tfyd.onion/ - Rewards for Justice: Submit tips and information about terrorists and criminals to the US State Department in exchange for monetary rewards.
he5dybnt7sr6cm32xt77pazmtm65flqy6irivtflruqfc5ep7eiodiad.onion - CIA - The official site of the Central Intelligence Agency in the USA. Don't be naughty.
http://ciadotgov4sjwlzihbbgxnqg3xiyrg7so2r2o3lt5wz5ypk4sxyjstad.onion - Defcon - The Tor site for the Defcon cybersecurity conference.
http://g7ejphhubv5idbbu3hb3wawrs5adw7tkx7yjabnf65xtzztgg4hcsqqd.onion/ - ProtonMail - Access your ProtonMail account over Tor.
https://protonmailrmez3lotccipshtkleegetolb73fuirgj7r4o4vfu7ozyd.onion/
Copy your desired onion URL and paste it into the address bar at the top of the screen to begin searching on the dark web. Alternatively, if the website has turned the onion URL into a link, you can click on that in the Tor browser, and it will automatically open the dark website.
Using Tor is especially helpful in countries where authoritarian governments censor the internet, preventing citizens from accessing news outside their country.
Tor allows you to circumvent these restrictions and get access to worldwide news, such as the BBC website shown below.

Source: BleepingComputer
Remember, the Tor browser connects to the internet differently than regular browsers in an attempt to increase your anonymity online.
This requires your connection to go through multiple nodes and relays, which will slow down browsing on Tor.
Please remember to be safe and enjoy using your newly installed Tor browser!
]]>
Kernel-mode Hardware-enforced Stack Protection is a security feature introduced in Windows 11 22H2 that protects systems from various memory attacks, such as stack buffer overflows.
Microsoft added this feature to Windows 11 22H2 as part of a Microsoft Defender update in April 2023.
When enabled, Kernel-mode Hardware-enforced Stack Protection will enhance the security of Windows by using hardware to enforce stack protection, making it more difficult for attackers to exploit vulnerabilities.
What is Kernel-mode Hardware-enforced Stack Protection?
Windows Kernel-mode Hardware-enforced Stack Protection is a security feature that primarily protects against stack buffer overflow attacks, where an attacker attempts to trigger arbitrary code execution by overflowing a buffer (temporary memory storage) on the stack (a data structure used to store a program's function calls and local variables).
During these attacks, the attacker attempts to overwrite the return address or control data to redirect the execution of a program to run malicious code of the attacker's choosing.
The technique of overwriting the return address or control data to redirect a program's execution flow is known as a Return-Oriented Programming (ROP) attack.
The Windows Kernel-mode Hardware-enforced Stack Protection feature requires a special hardware-based temporary stack called Shadow Stacks to work.
A Shadow Stack is a temporary memory stack that mirrors the standard stack used by the operating system, and the stack cannot be modified by applications running in Windows.
These Shadow Stacks are used in the following way:
- When a program's function is called, the return address is stored in both the normal stack and the Shadow Stack.
- When the function returns, the Hardware-enforced Stack Protection feature checks if the return address from the primary stack matches the one stored on the Shadow Stack.
- If the return addresses match, the function returns as expected, and the program execution continues normally.
- However, if the return addresses do not match, this could indicate an attack, such as a stack buffer overflow or an ROP attack. When this happens, Windows will terminate the process to prevent the execution of malicious code.
Using Shadow Stacks, Hardware-enforced Stack Protection feature can mitigate attacks, thus protecting the system from vulnerabilities, including zero-days.
However, as Shadow Stacks require Intel's Control-Flow Enforcement Technology (CET) technology, the feature is only available on newer CPUs.
Therefore, to use the Windows Kernel-mode Hardware-enforced Stack Protection, a device must have an Intel Tiger Lake CPU or AMD Zen3 CPU and later with CPU virtualization enabled in the BIOS.
How to enable Kernel-mode Hardware-enforced Stack Protection
While the Windows Kernel-mode Hardware-enforced Stack Protection feature can be complicated to understand, enabling the feature is fairly easy.
If you are running Windows 11 22H2 with the latest updates, open Windows Security and go into Device Security > Core Isolation.
If you have the required hardware and CPU virtualization is enabled, you will see a setting called 'Kernel-mode Hardware-enforced Stack Protection,' as shown below.
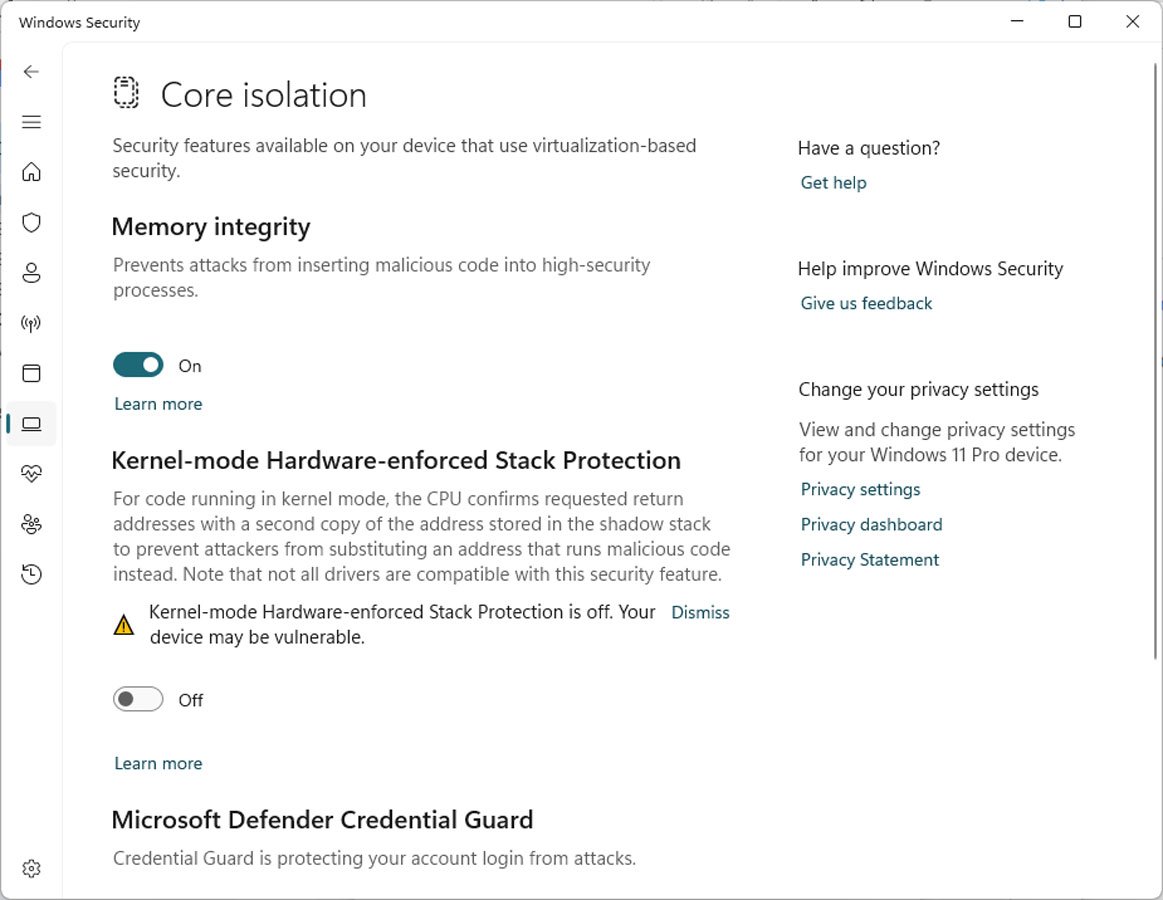
Source: BleepingComputer
To enable the feature, simply toggle it to 'On', and Windows will check the loaded device drivers to see if there are any that could conflict with the security feature.
If any conflicting drivers are detected, it will prompt you to review the list of drivers to update to newer versions before you can enable the feature.
Once you update the drivers to the latest versions, you can attempt to enable the feature again and see if there are any further conflicts.
If no conflicting drivers are found, Windows may prompt you to restart the computer to enable the feature.
May cause unexpected behavior
Unfortunately, when this feature is enabled, you may find that specific programs no longer work as their drivers conflict with the Kernel-mode Hardware-enforced Stack Protection feature.
This commonly happens when Windows is unaware of a driver that conflicts with the feature and allows it to be enabled anyway.
While these conflicts could cause Windows to crash, it is more common that the program will no longer launch, and Windows will state the driver is incompatible and prompt you to disable the security feature.
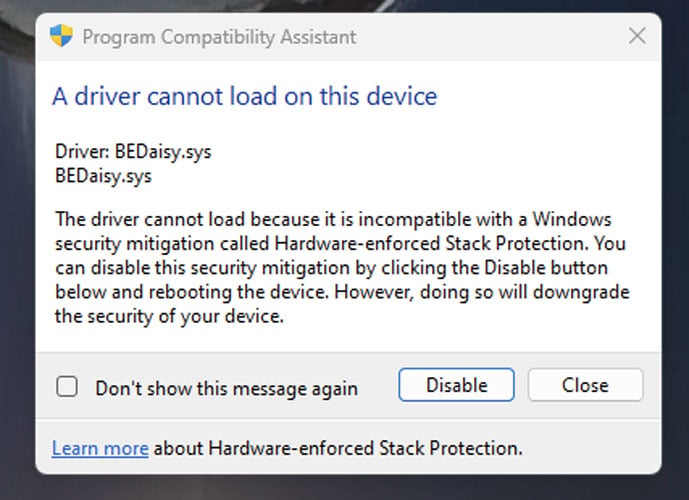
Source: Reddit
Users who have enabled this feature report that many of the conflicts are with copyright protection and anti-cheat drivers used by games, including PUBG, Valorant (Riot Vanguard), Bloodhunt, Destiny 2, Genshin Impact, Phantasy Star Online 2 (Game Guard) and Dayz.
However, as more users begin to use this Windows security feature, we will likely see upgraded versions of these anti-cheat and copyright protection programs to support stack protection.
]]>
The Registry Editor is a powerful application that allows you to access and edit the configuration settings of the Windows operating system.
The Windows Registry is a database containing various settings used by the operating system and installed software applications.
However, it is essential to be careful when using the Registry Editor, as making incorrect changes to the Registry can cause serious problems with your system, including preventing it from booting correctly.
Therefore, before using this guide to modify the Windows Registry, please make a backup of the Registry first.
What is the Windows Registry
The Windows Registry database stores the configuration options and settings for the Windows operating system and software installed on your computer.
The Registry is organized in a hierarchical structure containing keys and values, with five different 'root' keys at the top, as shown below, that serve a particular purpose.
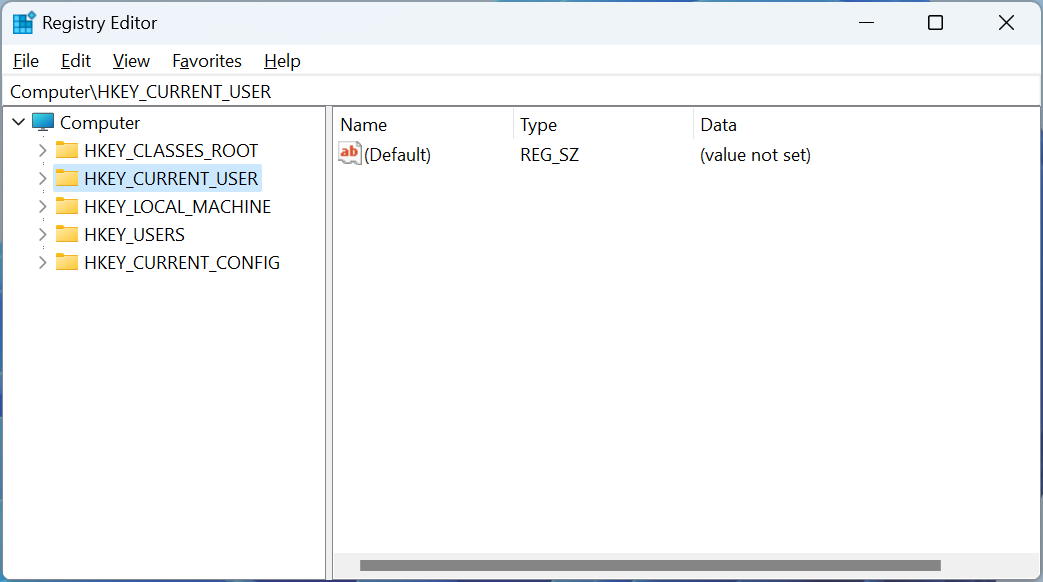
Source: BleepingComputer
The five different root keys in the Windows registry and their purposes are:
-
HKEY_CLASSES_ROOT (HKCR): This key stores information about file associations and OLE object classes.
-
HKEY_CURRENT_USER (HKCU): This key stores information about the current user's settings and a specific user's preferences for various applications.
-
HKEY_LOCAL_MACHINE (HKLM): This key stores information that affects the entire computer, regardless of the logged-in user. These settings are for the computer's hardware, operating system configuration, and software settings that affect all users.
-
HKEY_USERS (HKU): This key stores information about all users who have logged on to the computer.
-
HKEY_CURRENT_CONFIG (HKCC): This key stores information about the current hardware configuration of the computer.
For the most part, you will be modifying keys and values under the HKCU and HKLM root keys.
Registry keys are like folders containing other keys and values used to organize and group related settings.
For example, the HKEY_CURRENT_USER key contains settings for the current user account, such as a user's desktop wallpaper, installed application preferences, and personal settings.
While keys are like folders, Registry values are the files stored within them, containing the specific settings for a particular key. They can have different data types, including text, numbers, and binary data.
There are several different types of registry value data types:
- REG_SZ - A string value that contains text data, such as a username or folder path.
- REG_DWORD - A numeric value that contains a 32-bit integer.
- REG_QWORD - A numeric value that contains a 64-bit integer.
- REG_BINARY - A value that contains binary data, such as an image or sound file.
- REG_MULTI_SZ - A string value that contains multiple strings separated by null characters. This is often used for lists or arrays of values.
Each registry value type is used for a specific purpose, and understanding them can help you better manage and customize your Windows operating system.

Source: BleepingComputer
However, for the most part, when editing the Registry, you will be modifying REG_SZ values for text data and REG_DWORD for numeric data, as they are the most common data types used to stored user-editable data.
Using the Windows Registry Editor
The Windows Registry Editor is a software application created by Microsoft and built into all versions of Windows that allows you to edit the data in the Registry.
The Registry Editor application is located at C:\Windows\regedit.exe, and for the most part, requires administrative privileges to use it properly.
To open the Registry Editor, press the Windows key + R to open the Run dialog box. Next, type "regedit" in the search box and press Enter. If you are shown a prompt asking if you would like to allow the program to make changes, select 'Yes' to continue.
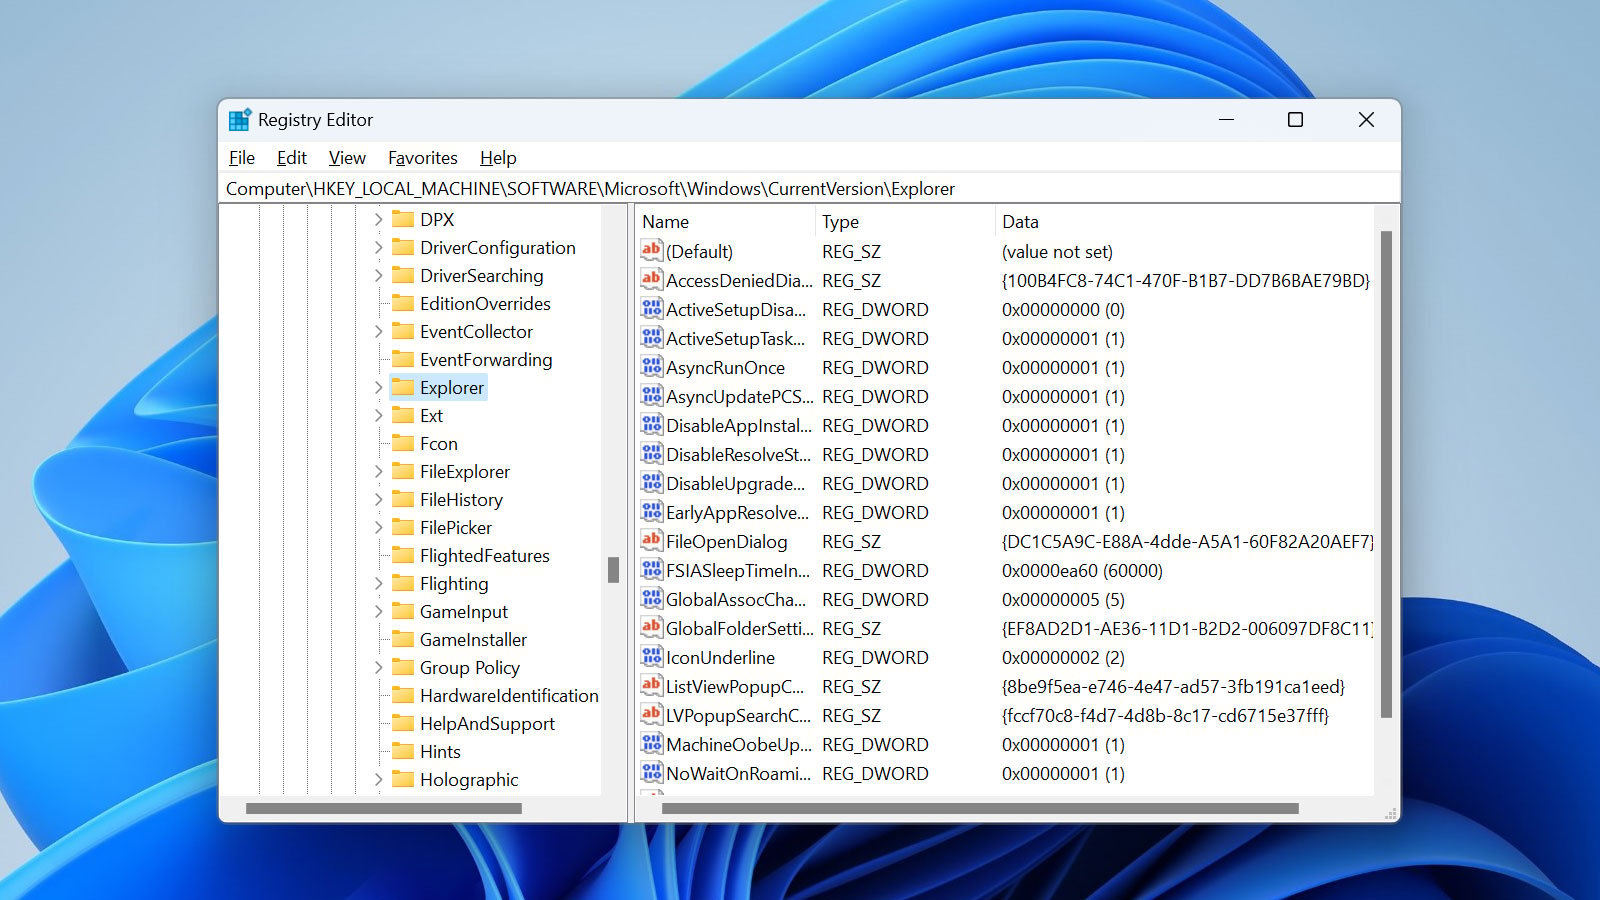
When the Registry Editor is opened, you will see that the window is divided into two panes. The left pane displays a hierarchical tree structure of the Registry's various keys (folders) and subkeys (subfolders).
The right pane displays the values and data associated with the selected key in the left pane.
Source: BleepingComputer
To open a specific Registry key, use the left pane to navigate to the key you want to edit. Then expand a key and click on the plus sign (+) next to it.
To collapse a key, click the minus sign (-) next to it.
When you click on a key in the left pane, the values stored within it will be shown in the right pane.
Now that we know how to navigate the Windows Registry let's learn how to modify data stored within it.
Create a new Registry key
When configuring new settings in the Windows Registry, you may need to create a key at some point.
Use these steps to create a new key in the Registry:
- Right-click on the key you want to create a new subkey under in the left pane.
- Select New -> Key.
- Enter a name for the new key and press Enter.
Creating a Registry value
As Registry values contain the data that configure how an application or Windows works, it is common to need to create Registry values.
Use these steps to create a Registry value:
-
Navigate to the key where you want to create the value.
-
Right-click on the key and select "New" and then select the type of value you want to create. The kinds of values you can make are explained in the previous section.
-
Give the new value a name by typing it in the box that appears.
-
Double-click on the new value to edit its data.
-
Enter the desired value data and click OK.
Renaming Registry key
Sometimes you may need to rename a Registry value, such as when introducing a typo.
To rename a Registry key, please follow these steps:
- Navigate to the key you want to rename.
- Right-click the key and select Rename.
- Enter the new name for the key in the editable field.
- Click anywhere to save the changes.
Renaming a Registry value
Sometimes you may need to rename a Registry value, such as when introducing a typo.
To rename a Registry value, please follow these steps:
- Right-click the value you want to rename in the right pane and select Rename.
- Enter the new name for the key in the editable field.
- Click anywhere to save the changes.
Editing Registry value data
To make changes to a Registry value, follow these steps:
- Double-click on the value you want to edit in the right pane.
- The Edit dialog box will appear.
- Enter the new value for the key in the 'Value data' field.
- Click OK to save your changes.
Export a Registry key
It is possible to export Registry keys and all their subkeys and values to a registry file.
A registry file ends with .reg, and when you double-click on one in Windows, it will import the data back into the Registry. Exporting a registry key helps create a backup before you make changes to the Registry.
- Right-click on the key you want to export in the left pane.
- Select Export.
- Choose a location to save the exported key and give it a name.
- Click Save.
Import a Registry key
If you had previously exported a key, you could import its data into the Registry by importing the file using these steps:
- Click on File -> Import.
- Navigate to the location where you saved the exported key.
- Select the key file and click Open.
Delete a Registry key
If you need to delete a Registry key, use the following steps.
- Right-click on the key you want to delete in the left pane.
- Select 'Delete' from the context menu.
- Confirm that you want to delete the key by clicking Yes.
Note: If you delete a key, all subkeys and values underneath them will be deleted too!
Note 2: You should only delete a registry key if you know it will not cause issues with your computer!
Delete a Registry value
If you need to delete a Registry value, use the following steps.
- Right-click on the value you want to delete in the right pane.
- Select 'Delete' from the context menu.
- Confirm that you want to delete the value by clicking Yes.
Note: You should only delete a registry value if you know it will not cause issues with your computer
When done using the Registry Editor, you can close it by clicking on the X in the Window or clicking on File > Exit.
With these steps, you should now be able to use the Windows Registry Editor to navigate and edit the Registry.
However, it is vital to be careful when making changes to the Registry, as incorrect changes can cause severe problems with your system.
It is always recommended to create a backup of your Registry before making any changes.
]]>
The Windows Registry is a crucial Windows operating system component that stores configuration settings and options.
However, if you incorrectly make changes to the Registry, it could cause Windows to no longer start, for it to crash unexpectedly, or for applications to no longer work correctly.
Therefore, it is always essential to back up the Windows Registry before making any changes.
In this tutorial, we will explain how to manually backup the Windows Registry and save it to a file.
To create a backup of the Registry, please follow these steps:
Step 1: Open the Registry Editor
- Press the Windows key + R to open the Run dialog box.
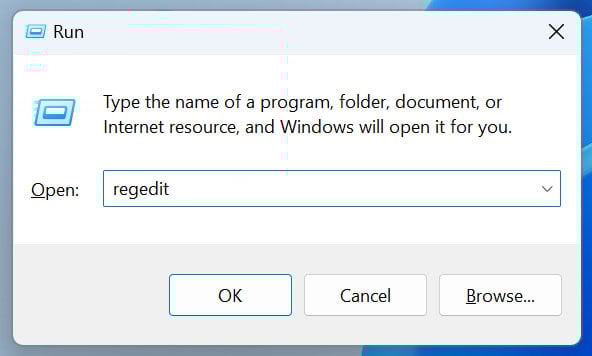
Opening the Registry Editor
Source: BleepingComputer - Type "regedit" (without quotes) in the text box and click "OK" or press Enter.
- A Windows User Account Control (UAC) prompt will now be displayed, where you should click Yes to continue.
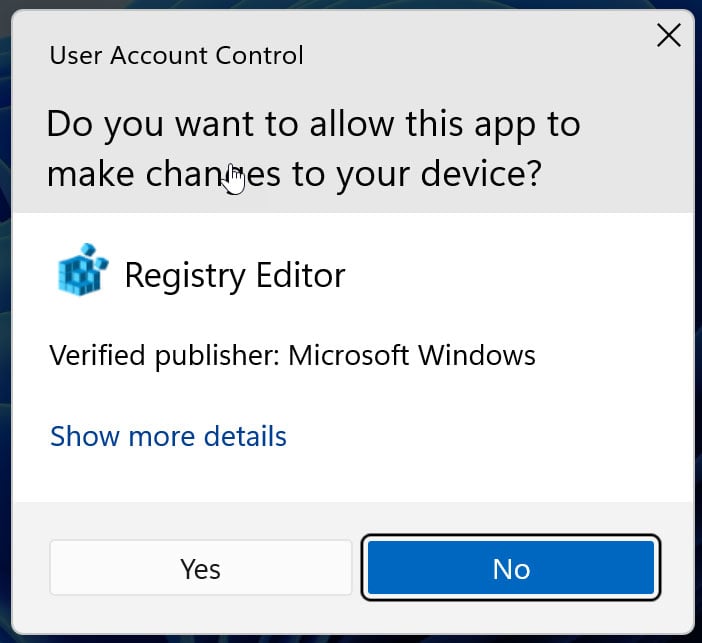
Registry Editor UAC Prompt
Source: BleepingComputer
Step 2: Click on the Export button
- In the Registry Editor, click on 'File' in the top-left corner of the window.
- From the drop-down menu, select 'Export' to open the Export Registry File dialog box.

Select the Export option in the Windows Registry Editor
Source: BleepingComputer
Step 3: Choose a Backup Location and File Name
- In the Export Registry File dialog box, navigate to the storage folder where you want to save the backup file.
- Type a descriptive file name for your backup in the 'File name' field. For example, 'manual-backup-04-24-23.reg'.
- Make sure the 'Save as type' field is set to 'Registration Files (*.reg)'.
- In the 'Export range' section, you can choose whether to download All of the Registry (default selection) or specific parts of the Registry you want to backup.
- Select 'All' to back up the entire Registry or 'Selected branch' to paste a full Registry key path to backup from. For example, a full registry path is "HKEY_LOCAL_MACHINE\SOFTWARE\Microsoft".
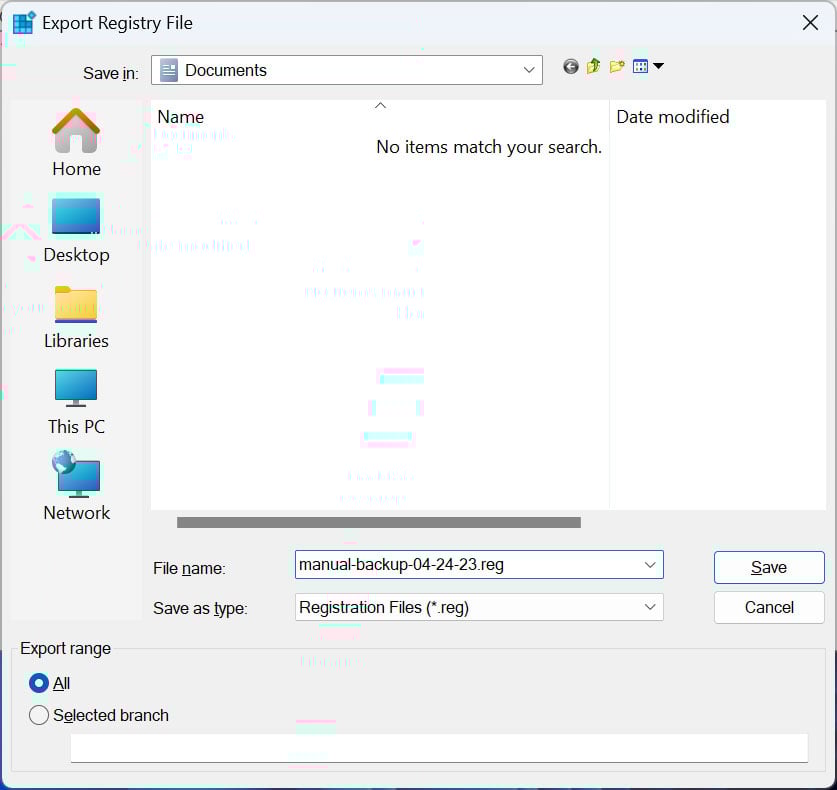
Backup the Windows Registry to a file
Source: BleepingComputer
Step 5: Back up the registry to a file
- Now, click on the 'Save' button save the Registry to a backup file. If you are backing up the entire Registry, this process can take quite a while, so please be patient.
- Once the backup is complete, you'll see the backup file in the location you specified earlier. You may want to store this file in a safe place, such as an external hardware or USB key.
You have now successfully created a manual backup of the Windows Registry to a file!
Remember always to create a backup of the Registry before you modify it so that you always have a working copy you can restore if you run into issues.
If you ever need to restore your Registry from a backup, double-click the .reg file and follow the prompts.
]]>
The Windows 11 Command Prompt is an application that allows you to launch programs and change settings by typing commands into a window.
Compared to similar features in the Windows GUI interface, command-line applications that run from the command prompt typically provide more options and granular features when performing a task.
For example, you can copy folders and files, execute PowerShell scripts, or even query specific network and computer configuration information from the command prompt.
When you open a Command Prompt, any command you execute will run under the security privileges of the logged-in user. Therefore, if you try to run a command-line program that requires Administrator privileges, you will not be able to do so and will be shown an 'Access denied' or other error, as shown below.
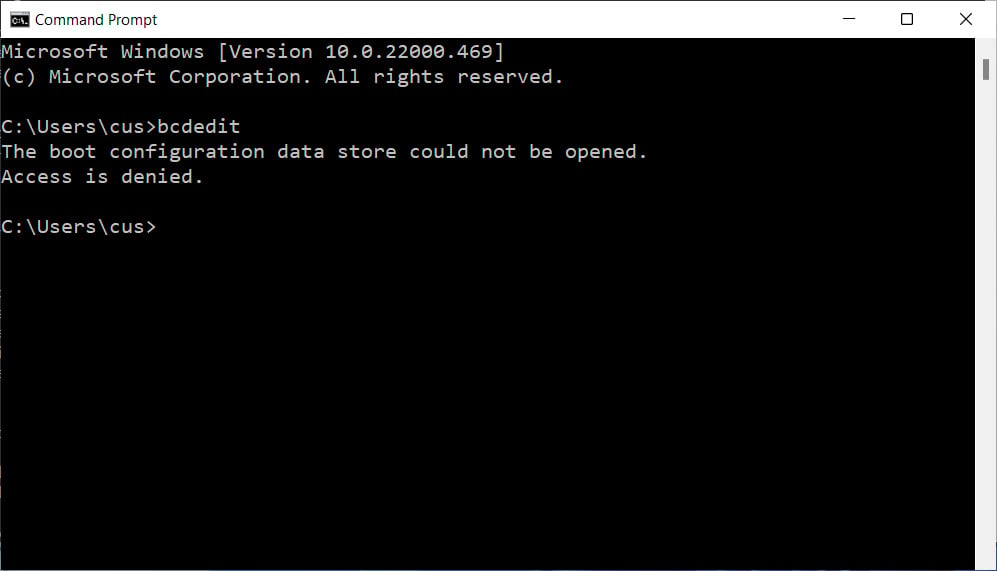
However, it is possible to open a Command Prompt with Administrator privileges that allow you to run any command you wish, which we can explain below.
How to launch a Windows 11 Administrator Command Prompt
To open Windows 11 Command Prompt with Administrator privileges, you need to open the Command Prompt in a certain way.
First, click the Start Menu and type cmd into the search field. Then, when the 'Command Prompt' search result is shown, right-click on it and select Run as adminsitrator, as shown below.
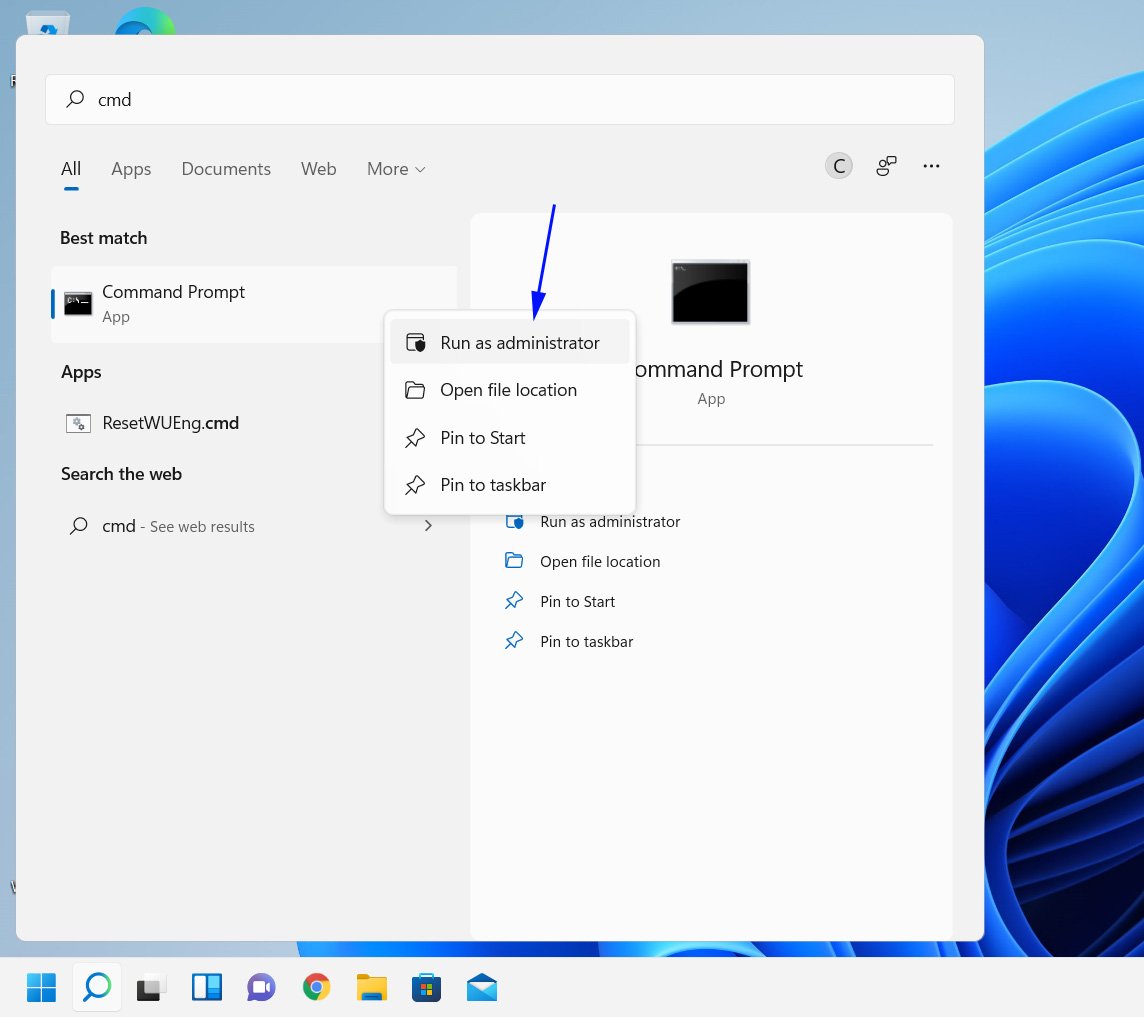
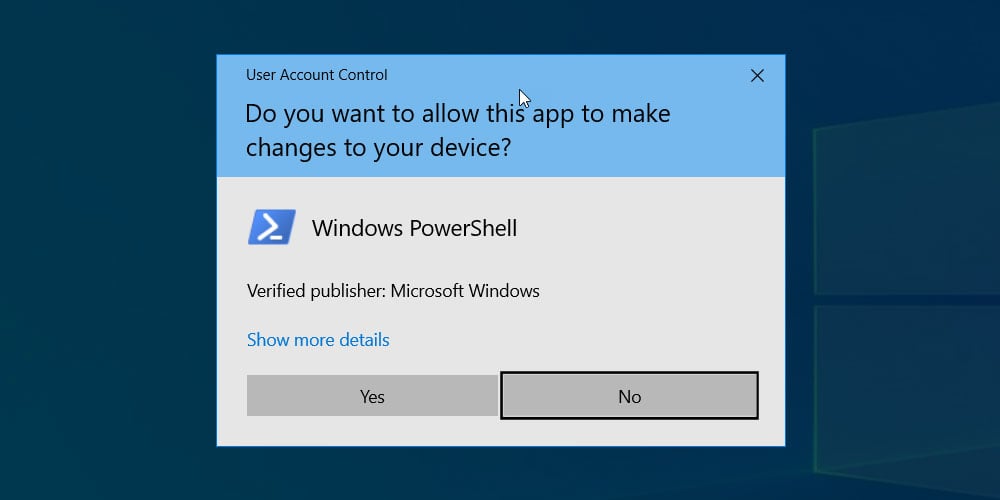
When you select Run as administrator, Windows 11 will display a User Account Control prompt asking if you would like the 'Windows Command Processor' to make changes on your device.
At this prompt, click on the Yes button.
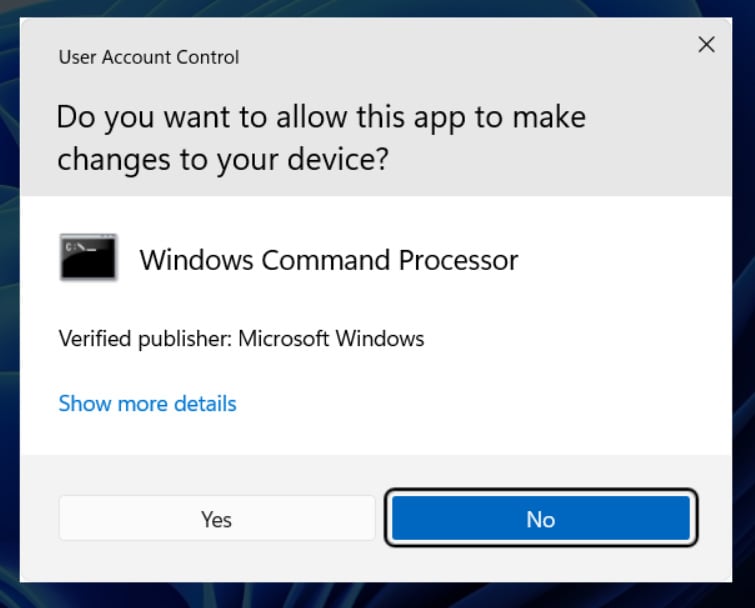
User Account Control Prompt
Once you click on the Yes button, a Windows 11 Administrator Command Prompt will be opened.
You can tell that the Command Prompt is running with Administrator privileges because the window title will state "Administrator: Command Prompt," and you will be in the C:\Windows\System32 directory, as shown below.

As we previously noted, the Administrator Command Prompt will start in the C:\Windows\System32 folder rather than your User Profile (C:\Users\[account_name]).
As this is a very sensitive folder with files required for the proper operation of Windows, it is suggested that you change to your user profile instead.
To do this, type cd %userprofile% and press the enter key on your keyboard.
In this Elevated Command Prompt, you can now launch programs or access files that require Administrative privileges.
You can read our Introduction to the Windows Command Prompt tutorial for more information on the Command Prompt and how you can use it.
]]>
By default, the Windows 10 Start menu will open up in a size that accommodates all of the pinned items. For those who wish to use a larger Start screen, making the Start menu open in a full-screen mode is possible.
When the full-screen mode is enabled, the Start screen will overlay the entire desktop and provide a more generous amount of space to pin applications, and your live tiles will be larger.
If you wish to enable the Start full-screen mode, please follow these steps:
- Click on the Start menu and then click on the Settings cog (
 ) to open the Windows 10 Settings.
 - When the Settings open, click on Personalization and then Start.
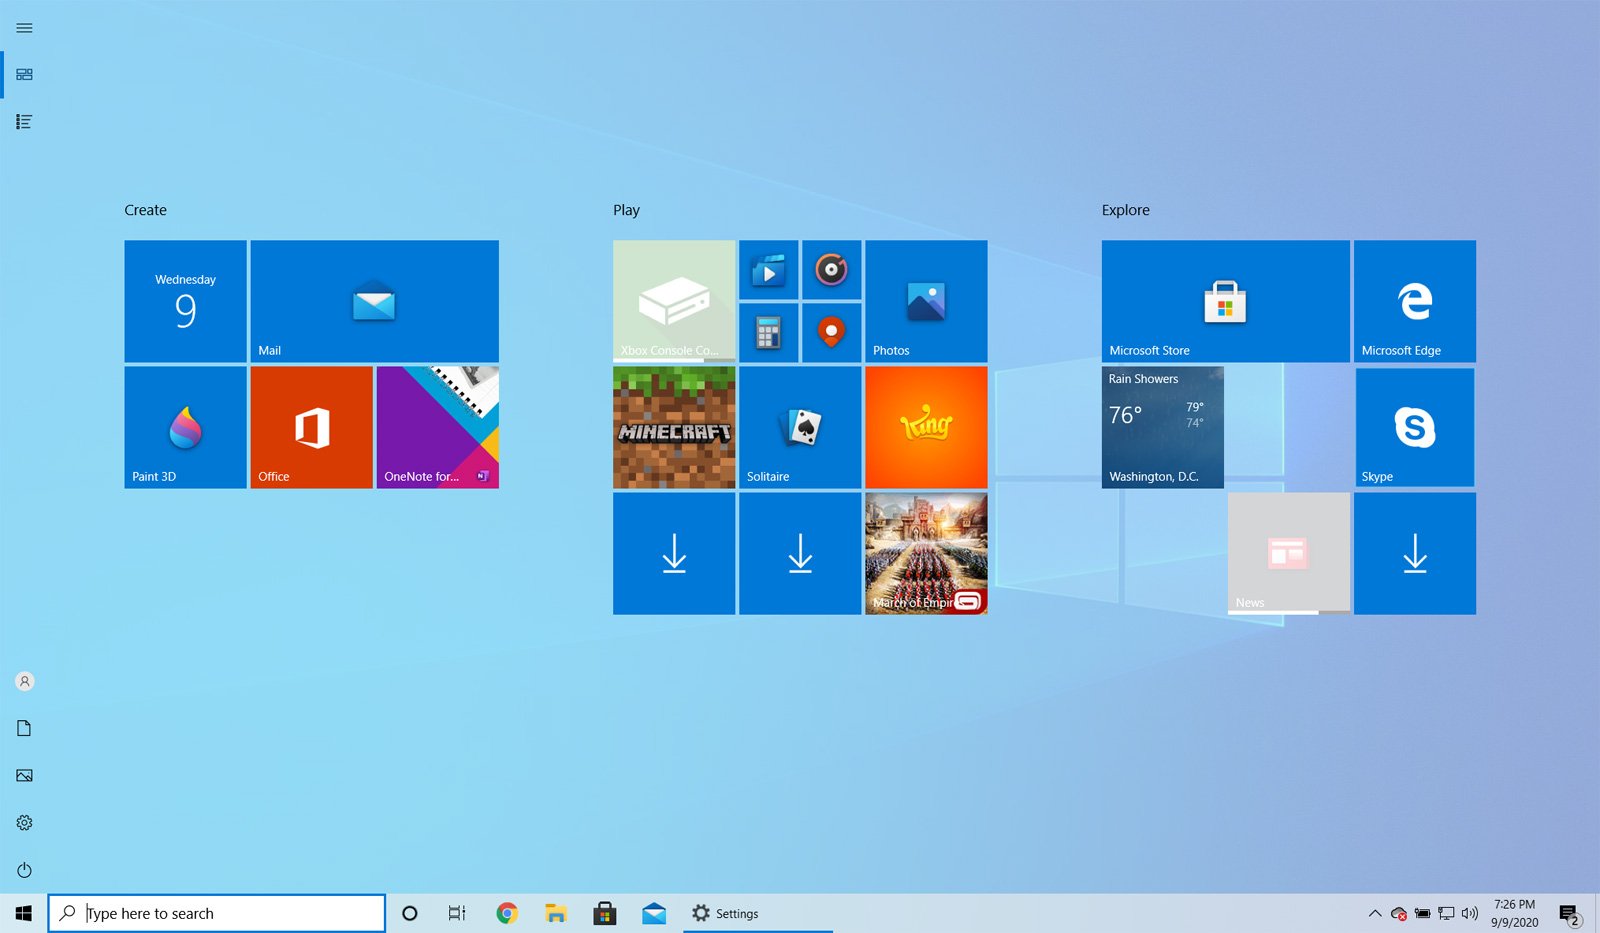
- In the Start settings, look for a setting named 'Use Start full screen' and click on the toggle to enable the feature, as shown below.

Enable Start full screen - You can now close the Start settings screen.
Now that you have enabled Start full screen mode, when you click on the Start button, the Start menu will be shown in full screen and overlay the entire desktop.
When using Start in full screen mode, you can close the Start menu at any time by pressing the Escape key on your keyboard or by clicking on another program or screen.
To disable Start full screen mode, just follow these steps again, but this time disable the 'Use Start full screen' setting.
]]>
If you start a program and receive an error stating that the program you are trying to run needs the Microsoft Visual C++ 2015 Runtime, you can use this tutorial to install the package so that your program works again.
When developers create a Windows program using Microsoft Visual Studio 2015, there are specific dynamic link libraries (DLLs) that their programs are linked to work correctly.
These DLLs are distributed through the Microsoft Visual C++ 2015 Runtime, and if the package is not installed, users will encounter errors stating that DLLs are missing or you need to install the runtime.
As an example, the video game Valorant released an update today that did not include the Microsoft Visual C++ 2015 Runtime, causing the game not to work after the update was installed.
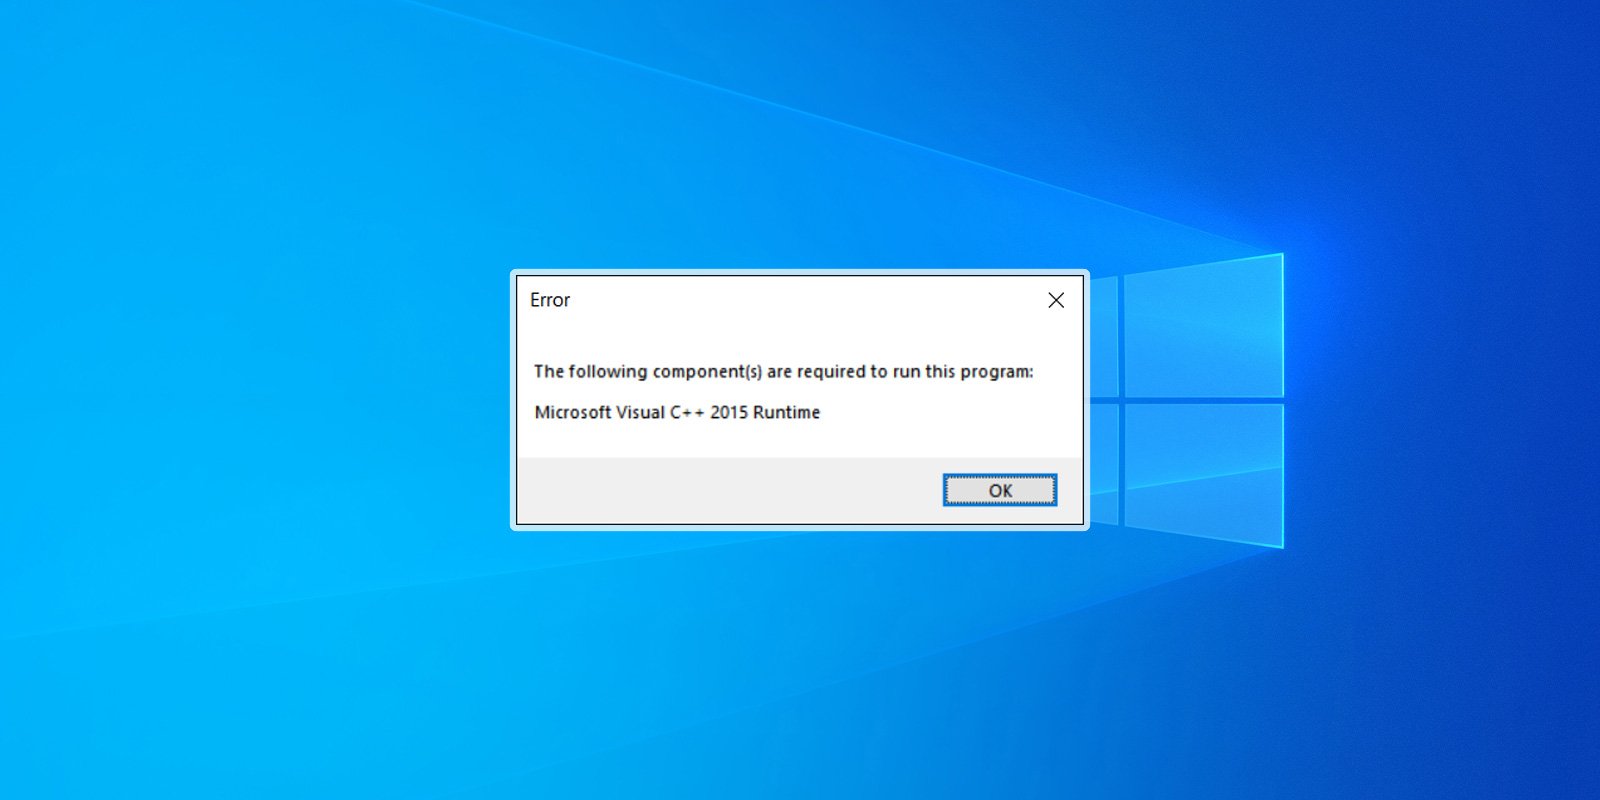
When users launch Valorant, they are instead greeted with the following error.
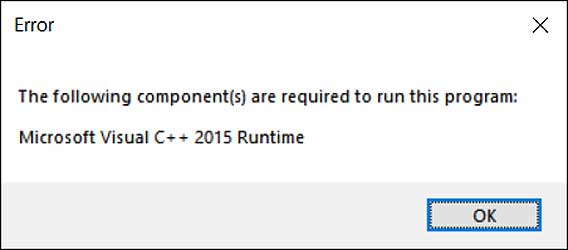
"The following component(s) are required to run this program: Microsoft Visual C++ 2015 Runtime"
The good news is that it is really easy to fix this problem by downloading and install the runtime from Microsoft's website.
To install the Microsoft Visual C++ 2015 Runtime, please follow these steps:
- Go to the Microsoft Visual C++ 2015 Redistributable page from Microsoft and click on the Download button.
- You will be brought to a page where it asks you to select whether you want to download the 32-bit or 64-bit version of Windows. Select the version you need and click the Next button. If you are unsure what version you need, you can use this tutorial to determine what you need.
BleepingComputer suggests that you download and install both the x86 AND x64 versions of the runtime to not run into issues in the future. - The files will now be download to your computer. Once downloaded, double-click on the downloaded vc_redist.x64.exe file.
- The Microsoft Visual C++-2015 Redistributable screen will be displayed and ask you to agree to the license terms and conditions. Put a checkmark in the "I agree" box and then click on the Install button.
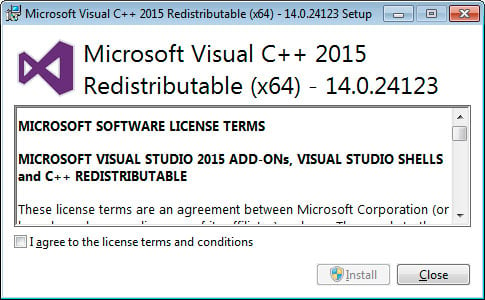
Microsoft Visual C++-2015 Redistributable - If Windows prompts you to allow the program to make changes or continue, click on the Yes or Allow button.
- When done, the program will display a message stating that it was successfully installed.
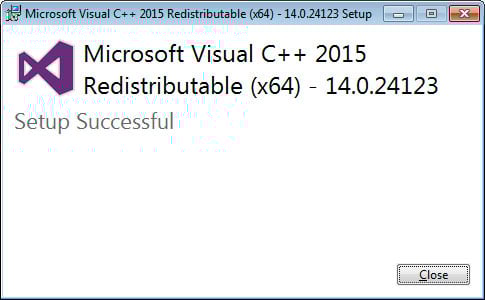
Redistributable Installed - Now perform the same steps to install the vc_redist.x86.exe runtime.
- You can now close the installer.
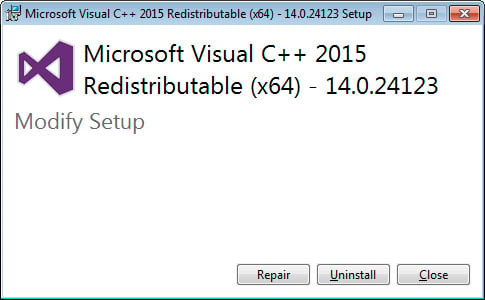
If you already had the Visual C++ 2015 Runtime installed, you can run the above redistributables and perform a repair.
You can now try to run the program that previously gave the missing runtime error, and it should work again.
]]>
Since 2006, Microsoft has been bundling the PowerShell command-line shell that administrators can use to manage their computers and other computers on a network.
"Windows PowerShell is a Windows command-line shell designed especially for system administrators. Windows PowerShell includes an interactive prompt and a scripting environment that can be used independently or in combination," Microsoft explains.
Many PowerShell commands, though, require elevated or administrator permissions, and you need to launch an elevated PowerShell prompt to execute them.
This guide will provide two methods that you can use to launch an elevated PowerShell administrator prompt.
Method 1: Use the Windows 10 Start Menu context menu
When you right-click on the Windows 10 start menu, a context menu will appear that allows you to launch frequent administrative programs quickly.
Included on this context menu is an option called 'Windows PowerShell (Admin)', as shown below.
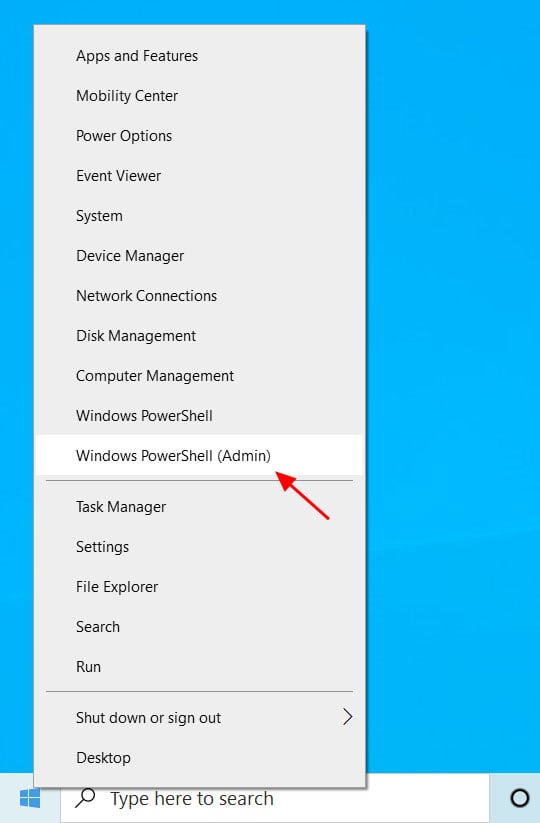
To launch an elevated PowerShell prompt, click on the 'Windows PowerShell (Admin)' option.
Windows 10 will now display a UAC prompt asking if you want to give the program elevated permissions. Click 'Yes' at this prompt.
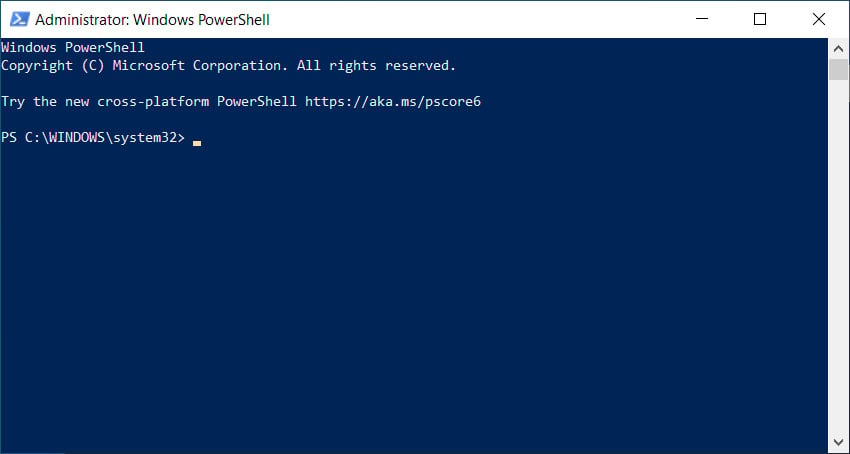
An elevated PowerShell prompt will now open. You can tell it is elevated as the starting directory will be C:\Windows\System32 and the window title will be 'Administrator: Windows PowerShell'.
When done using the prompt, you can close it by clicking on the X or by typing 'exit' and then pressing enter.
Method 2: Launch PowerShell from elevated command prompt
If you have an elevated command prompt already open, you can launch a PowerShell shell within it by simply typing 'powershell' and pressing enter.

When launched in this way, the PowerShell prompt will look slightly different as the background will not be blue, and it is running as a shell under the regular command prompt.
To exit back to the elevated command prompt, you would type 'exit' and press enter.
]]>
The web is made up of terrific content from all over the world and sometimes the content you want to read is written in a different language. Thankfully, Google Chrome has built-in support for the Google Translate service, which will automatically translate the page into a language of your choice.
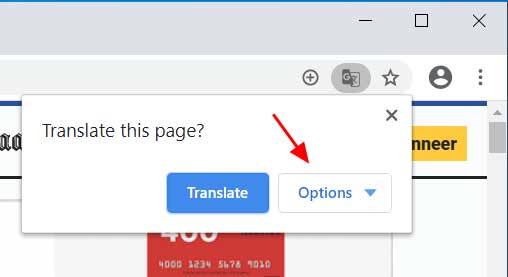
If you visit a website with Google Chrome and it is written in a different language, the browser will automatically display a prompt asking if you wish to translate the page into your default language as shown below.

If you click on the Translate button, Google will send the URL to the Google Translate service, which will cause the page's contents to be translated to your default language. This can be shown in the site below, which has been translated from Dutch to English.

If the Translate prompt does not appear when visiting a foreign site, you can cause it to display by clicking on the ![]() button in the Chrome address bar as shown below.
button in the Chrome address bar as shown below.

Selecting the language you wish to translate to
By default, Google Chrome will translate a web page to the default language configured in your operating system.
If you wish to translate a page to a different language or Google Chrome is having trouble detecting the correct language of the page, you can select what language you want to translate from and to by going into the Translate options.
This page can be accessed by clicking on the Options button in the 'Translate this page' dialog as shown below.
When you click on the Options button, you should then select Change languages to be brought to a page where you can select the language of the page and what you would like to translate it to.
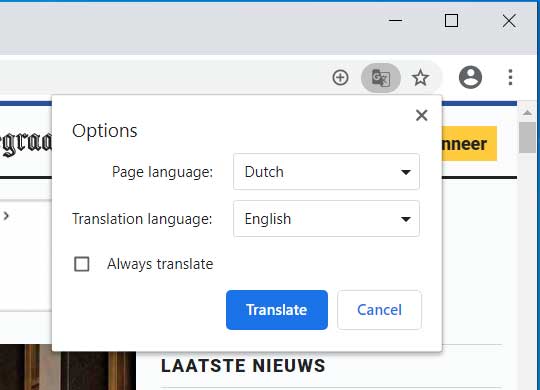
When ready, click on the Translate button and the page will be translated from and to the configured languages.
]]>
Google Chrome is currently the most popular browser for Windows as it offers good performance, excellent compatibility with web sites, and a huge amount of extensions that can be used to extend the functionality of the browser.
If you are using a different browser and wish to install Google Chrome or if you are using Google Chrome and want to know how to uninstall it, you can follow the steps below.
How to install Chrome in Windows
To install the Google Chrome browser in Windows, please follow these steps:
- To download Google Chrome, go to https://www.google.com/chrome/ page and click on 'Download Chrome'.
- You will now be shown the Google Chrome Terms of Service. At this page, uncheck the "Help make Google Chrome better by automatically sending usage statistics and crash reports to Google" and click on the "Accept and install" button to download the Google Chrome installer.
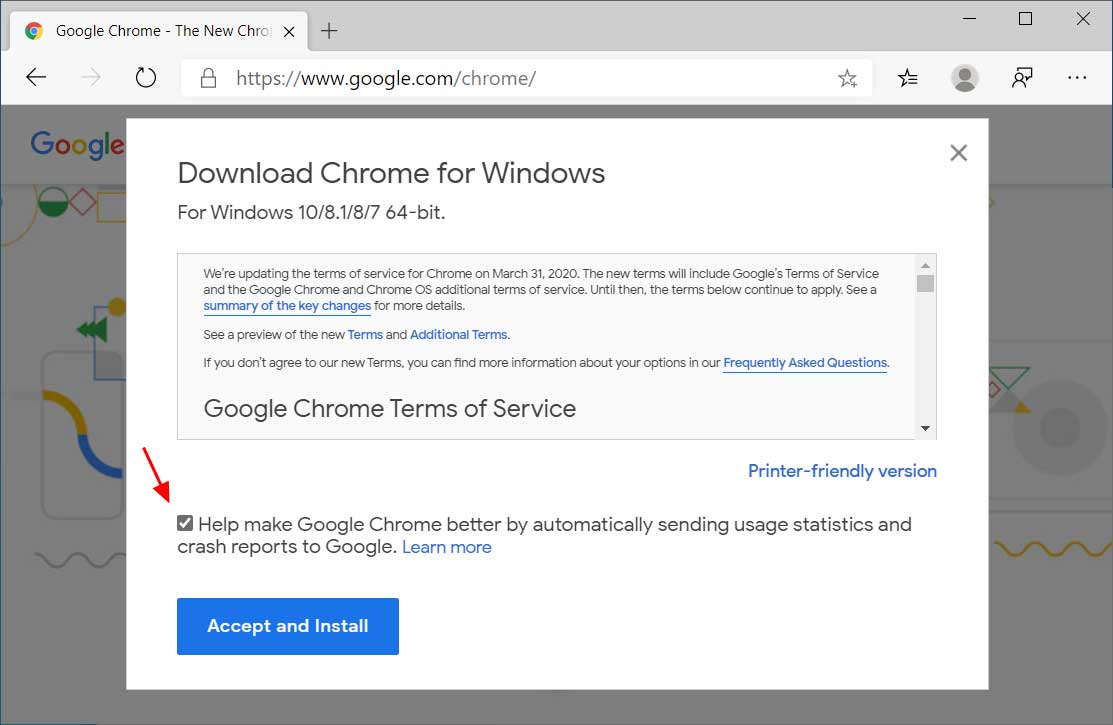
Download Google Chrome Installer - The ChromeSetup.exe file will now be downloaded. When finished, click on it as indicated by the red arrow in the image below to start the installation program.
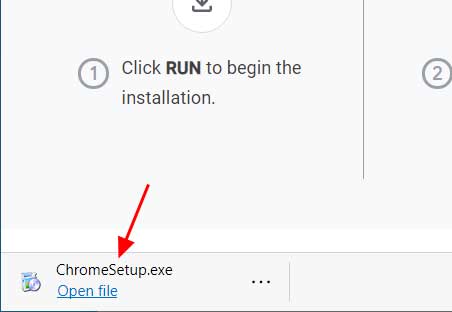
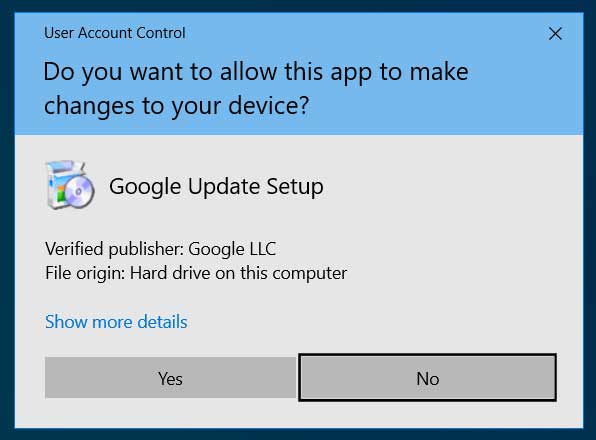
Launch Chrome Installer - When you click on the ChromeSetup.exe file, Windows will display a UAC prompt asking if you want to "allow this app to make changes to your device?". Click on the Yes button to continue.
UAC Prompt - Google Chrome will now begin to install on your computer.
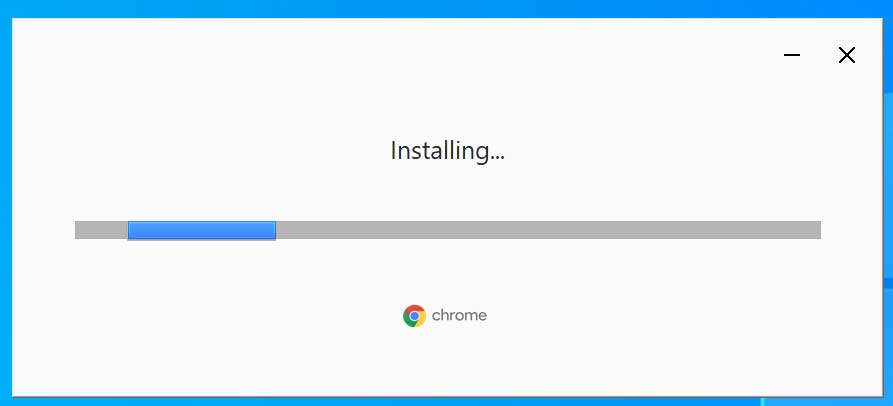
Installing Google Chrome - When finished, Google Chrome will automatically open and an icon for Google Chrome will be on your desktop that you can use to launch the program.

Chrome Icon
Now that Google Chrome is installed in Windows, you can either start it from the icon on the desktop or search for Chrome in the Start menu and launch it from there.
How to uninstall Chrome in Windows
To uninstall the Google Chrome browser from Windows, please follow these steps:
- Click on the Start button and type uninstall. When the Add or Remove programs option appears, click on it.
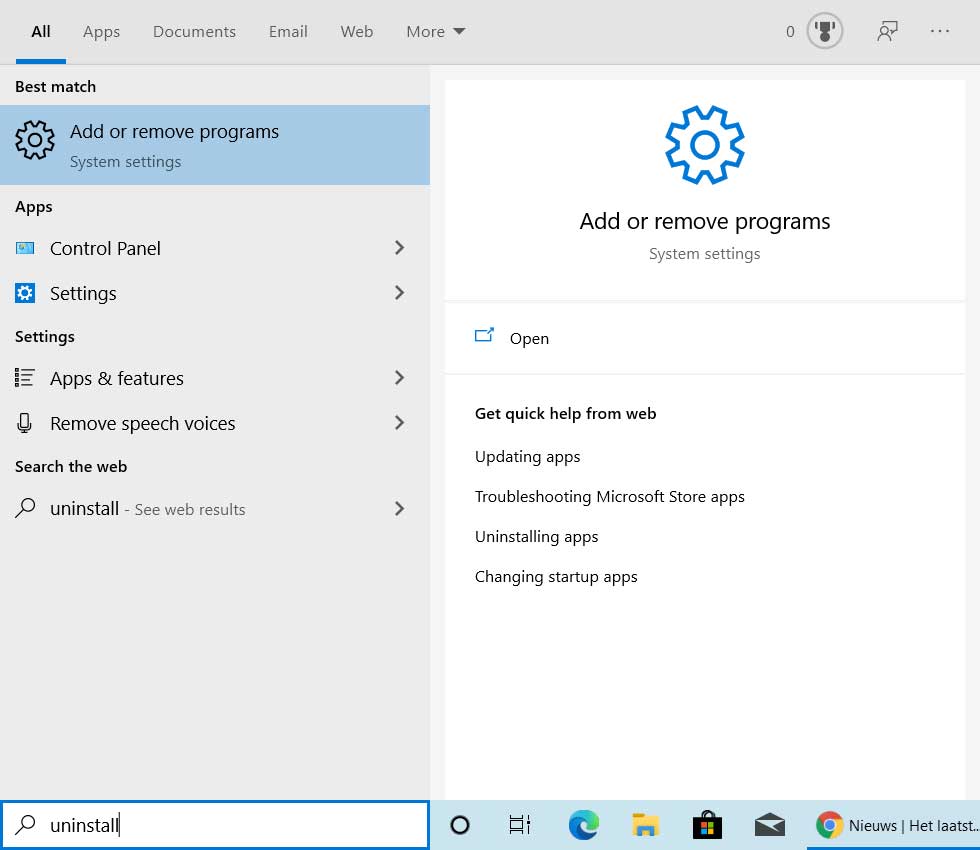
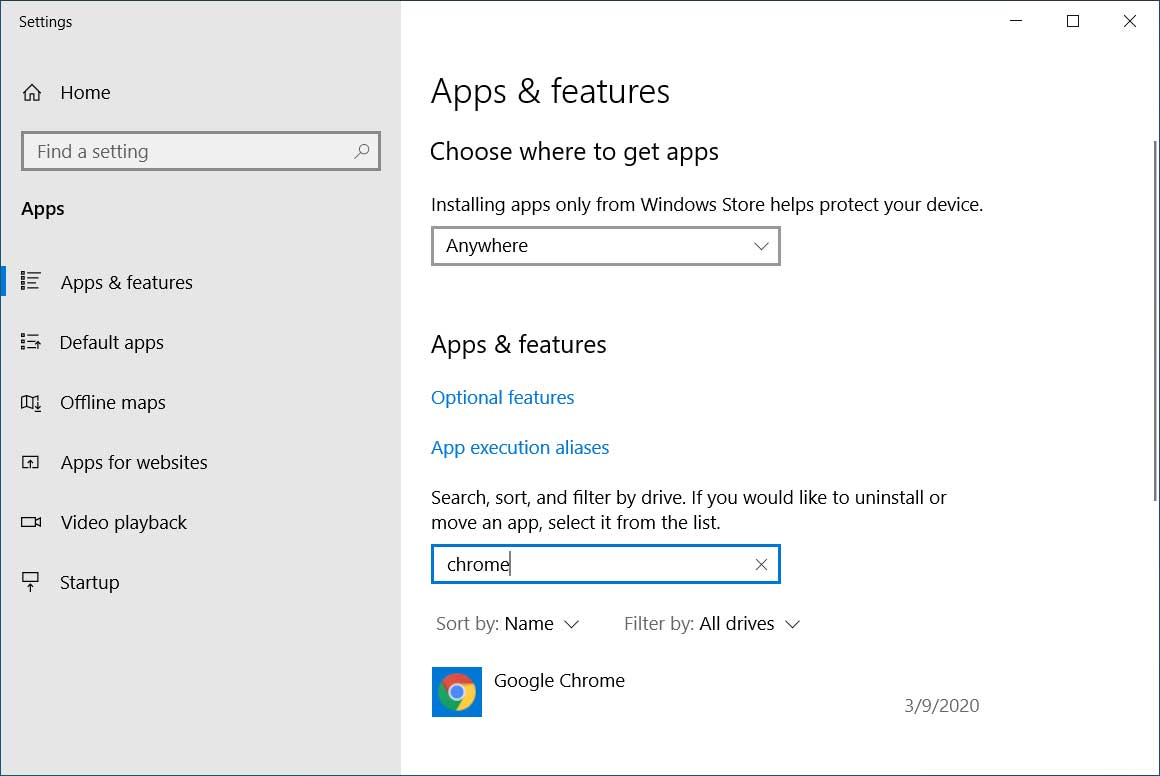
Open Apps & Features settings screen - The Apps & Features settings screen will now be displayed. Under Apps & features, search for chrome as shown in the image below.
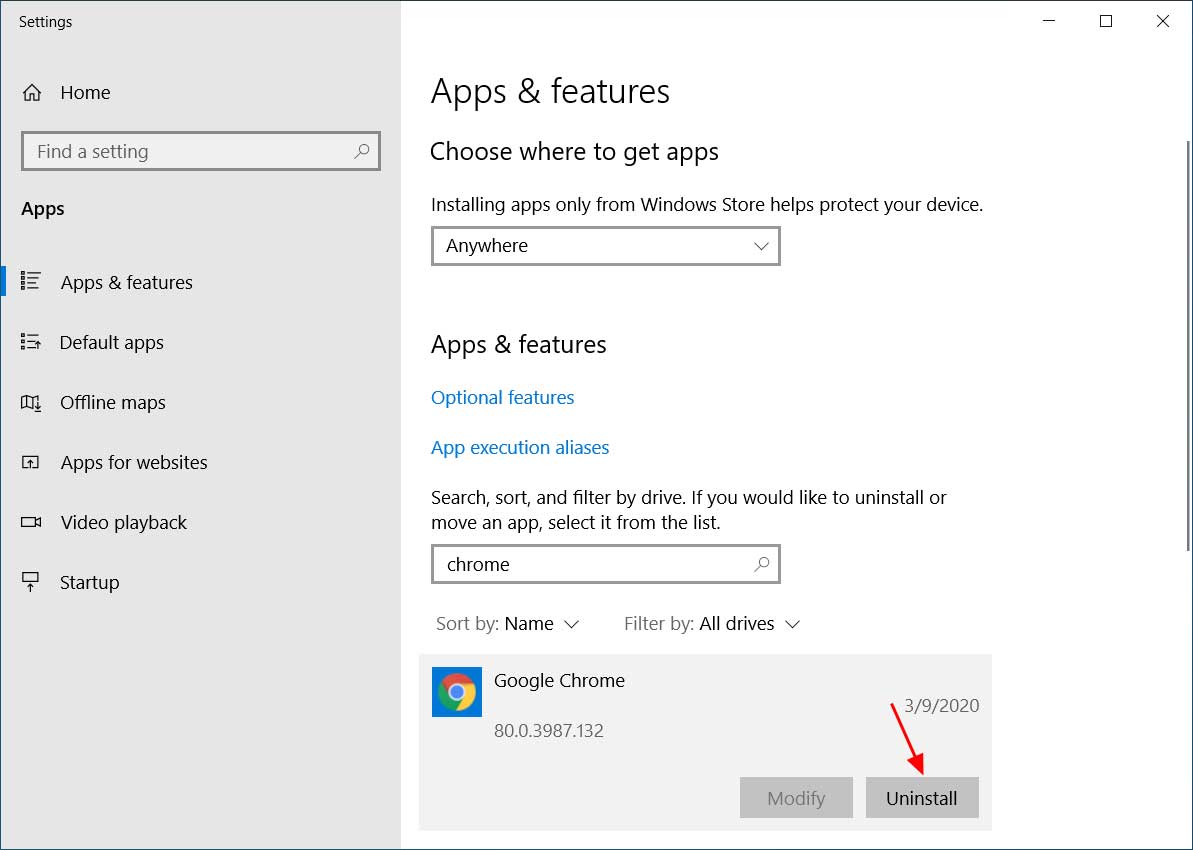
Search for Chrome - When Google Chrome is shown like below, click on the Uninstall button.
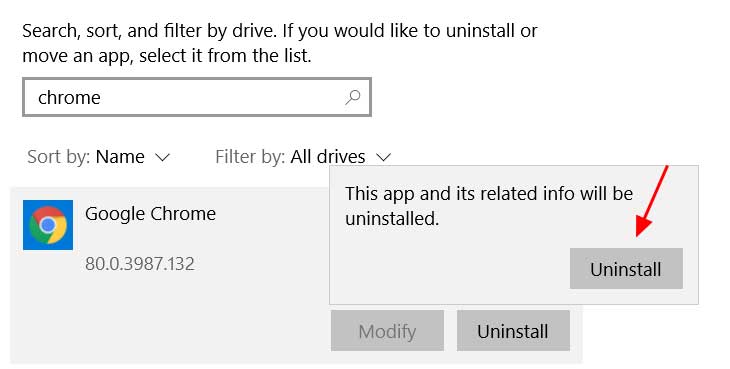
Uninstall Google Chrome - When you click Uninstall, Windows will prompt you again to make sure you want to uninstall Chrome. At this prompt, click on the Uninstall button.
Confirm you wish to uninstall Google Chrome - Windows will now show you a UAC prompt asking if you wish to "allow this app to make changes to your device?". At this prompt click on the Yes button to continue.
- Believe it or not, Google Chrome will now ask if you are sure you wish to uninstall Google Chrome.
At this prompt, you can click on the Uninstall button, but I would not check the "Also delete your browsing data" option as you may want your bookmarks and settings to remain intact if you ever decide to reinstall the browser again.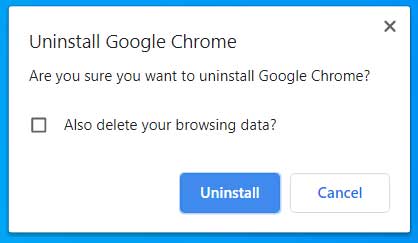
Google Chrome uninstall prompt - When done uninstalling, your default browser will open to a survey asking why you uninstalled the browser. You can simply close this screen.
- You can now close the Apps & Features settings screen.
Google Chrome will now be uninstalled from Windows.
]]>